
Calisthenics – Bodyweight Exercises – Burn Fat Beautifully
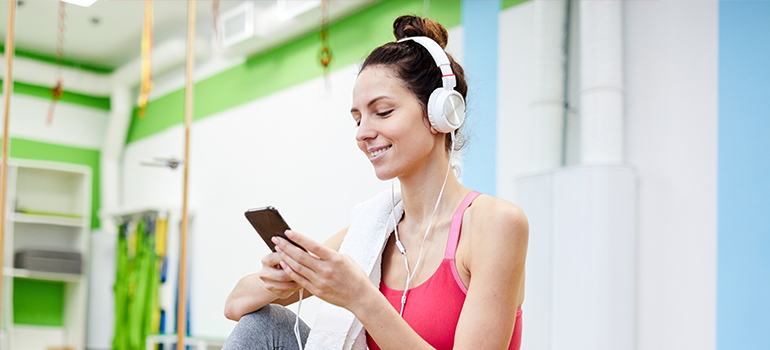
If you know me, you know that I love calisthenics or bodyweight exercises. They burn fat beautifully. In fact, I’d say that at least half of the workouts in my personal workout routine are bodyweight workouts.
What makes bodyweight exercises so great? Well, they use your body weight to help you build lean muscle, which can help you burn more fat. You’re using your own weight (whether it’s 100 or 250 pounds, or somewhere in between).
What does that mean, exactly?
Well, every part of your body has a different weight to it. The best bodyweight exercises use the weight of your limbs, core, and various parts of your body to give you the optimum results. And trust me, once you try these and realize just how much work you’re doing, you’re probably going to say goodbye to expensive free weights and gym equipment. You’ll see just how much using your body weight can help you with burning fat and building lean muscle.
Bodyweight Exercises for Weight Loss
The great thing about bodyweight exercises is that you can use them in bodyweight circuit training. Additionally, you can actually do more reps in each set, compared to when you’re using free weights or weights at the gym.
You can also build strength without buying any expensive equipment.
Now, I want to show you some of the best bodyweight exercises available to you. You don’t need any extra materials for these. Just you!
You’ll simply use your body weight and movements for strength training and weight loss.
NOTE: Don’t skip the ones you think you know because I’m going to walk you through each one. And you might be surprised at the proper form for some of these exercises.
Push-Ups: A New Look At An Old Exercise

Just because you’ve been doing push-ups for years, doesn’t mean you’re doing the perfect push up. However, whether you do regular push-ups or modified push-ups, they’re excellent bodyweight exercises.
What are modified push-ups? Well, depending on where your hands and legs are positioned, you can focus on different muscles while you do push-ups.
Right now, I’m going to focus on two different types of push-ups: the standard chest push-up and the modified tricep push-up.
How to Do Push-Ups Right:
It’s time to face the music, you may be doing push-ups wrong.
This doesn’t take away from the amount of exercise you’re doing. It simply can take away from the muscle groups you’re trying to focus on.
Let’s start with the proper push-up position.
So, there are typically two different types of push-ups.
The first one is a chest push-up. This is going to work your chest muscles along with a whole lot of other muscle groups.
For chest push-ups, you can achieve the proper form by getting on the floor and spreading your hands just a little bit wider than shoulder-width apart, with your fingers pointing slightly out.
Bend your elbows as you bring your chest toward the ground.
Depending on your range of motion, your girls (you know, the ones on your chest) are going to be between your hands. If you’re having trouble getting all the way down or up, don’t worry, keep working at it, and you’ll get there.
To complete the push-up, push straight up.
Remember, inhale on the way down; exhale on the way up.
So, the other push-up is called a tricep push-up. For the positioning on this push-up, you want your hands to be a lot more narrow. They are going to be closer together.
And with the tricep push-up, your fingers will be pointed inward, instead of slightly outward. This change in position turns your elbows, forcing your triceps to work harder to push you upward.
Just like with the chest push-up, you’ll bend your elbows to lower your body and push off the floor to push your body up.
For tricep push-ups, you will feel the muscles working immediately.
For more details on how to do the perfect push-up, check out this blog that explains everything.
Tip: Make sure your back is flat the entire time you’re doing a push-up. It is the most effective way to get the most out of the exercise.
Pull-Ups (With Resistance Band Assistance)

To complete effective pull-ups, you don’t necessarily need a band. However, you can do assisted pull-ups with a band, if you have one.
Pull-ups are a great place to start when it comes to strength training and weight loss because they can increase your heart rate and work your arm muscles.
Additionally, if you’re just beginning, you can do a dead hang if pull-ups are too difficult for you. Once you increase your full range of motion, you can work toward assisted pull-ups.
How to Do Pull Ups Properly:
The first thing you have to do is find a place to do pull-ups. You’ll need a bar, or (here’s a fun one) you can go for a hike and find a tree limb.
When doing the pull-up, you want your arms slightly wider than shoulder-width apart.
If the bar you’ve found is close to the floor, get on your knees for the starting position, just don’t use your leg muscles when you begin.
If you’re using a standard pull-up bar, start in the down position. If necessary, make sure a resistance band is attached to the bar. Put both of your feet in the band.
This will help you balance, and it’ll help you pull up.
No matter how high your bar is, to achieve proper form with a pull-up, make sure you raise your chin above the bar.
Do what you can. Pull-ups can be difficult when you first begin. However, over time, you’ll find that your arm strength and grip strength increase, and it becomes easier.
Jumping Jacks: An Oldie But Goodie

Next up, we have jumping jacks. The benefits of jumping jacks are nearly endless. They’re used for everything from warming up to cardiovascular exercise.
Their ability to raise your heart rate makes jumping jacks the perfect weight loss exercise.
And nearly everyone can do them.
How to Do Jumping Jacks Correctly:
Your starting position for jumping jacks should always be feet together.
When you jump out, make sure your feet are wider than shoulder-width apart. And you’ll want your arms overhead.
Complete the jumping jacks by bringing your feet back together and your arms down.
Use the balls of your feet as you gain momentum.
It’s that simple.
Burpees: They’re Not a Bodily Function

Burpees can seem to be at a completely new fitness level than you’re used to. They use your full body, and when you use most of the muscles in your body, you will feel it right away.
Most of all, burpees raise your heart rate. This makes them great for warming up and for weight loss.
And I won’t lie… they can be tough when you first begin. But they’re great for your body.
How to Do Burpees:
So, with the typical burpee, you’re going to start standing, feet shoulder-width apart. Then, bend your knees into a squat position.
Keep moving!
Place your hands on the floor, and next, you kick your feet back into a plank position (make sure you’re body is in a straight line). Additionally, make sure your back stays nice and strong. You don’t want to dip when you’re in the plank position.
Then, you jump in and pop up, back to standing position.
That’s the typical burpee. Do your first couple slowly; then, slowly increase your speed.
There are variations of burpees that you can do, including doing a push-up when you reach the plank position. You can also reach your hands over your head when you’re in the standing position.
Tip: if you have a large chest or larger belly, when you jump in, keep your feet spread apart. This will help you stay balanced.
When you jump back, bring your legs back together.
Dips (With Assistance): Burn Up The Triceps

Dips or tricep dips are great for the arms, chest, and shoulders. They are one of the best exercises to challenge your muscles and work your upper body.
I’ll warn you now, tricep dips look easy, but they’re going to work your muscles. You’ll feel the burn right away with these ones.
How to Do Dips with Best Form:
These are really going to work your range of motion, so if it’s not that great to begin with, don’t worry, you’ll get there.
The first thing you want to do to get the proper form is to find a bench, or chair, or a solid surface that can hold all of your weight.
Place your hands on the bench, keeping your elbows slightly bent. You want your fingers pointing slightly out.
Bend your elbows to lower yourself. When you reach the bottom position (depending on your range of motion), push up with your hands.
It’s kind of like a backward push-up.
Tip: make sure you point your fingertips slightly out and keep your back straight. This can relieve stress on your neck as you do your tricep dips.
Pike Push-Ups: Be A Mountain

Pike push-ups are great for your upper body, especially your shoulders. If you’re new to exercise, make sure to take these a little slower.
In a pike push-up, your body forms almost a triangle. Check out this description on the proper form.
How to Do a Pike Push Up Correctly:
The starting position for a pike push up is simply said, but not so easily mastered. You want to make sure your legs are in a straight line.
Bend at the waist, bring your hands to the ground, and put your head between your arms.
Again, this is an exercise that will help you extend your range of motion, but it’s also dependant on your range of motion.
Get up on the balls of your feet to get a little more comfortable.
Next, bend your elbows until the top of your head touches the ground (not hard!).
Then, extend your arms and push back up.
Tip: try to use your chest as little as possible. Attempt to put more weight on your shoulders.
One-Arm Planks

Every type of plank (including the single-arm plank) is a great bodyweight exercise that is perfect for strength training. Even a standard plank is a killer core exercise.
One-arm planks are perfect for anyone looking to get better balance, boost their core muscles, and get some strength training in.
One Arm Plank Form:
The starting position for a one-arm plank is very much like the starting position for the standard push-up.
Make sure your back forms a straight line, and you want to keep your arms straight and your legs extended.
In a plank, you want your hands directly underneath your shoulders. I see a lot of people reaching out. Don’t do that.
Think of this position as though you’re building a house. The floor is your foundation.
Your arms are the joists or beams. They go straight up.
Slowly take the pressure off of one of your arms. Hold this for ten seconds, or as long as you can.
Switch arms, and repeat.
Tip: make sure that you hold your one-arm planks equally. If you go 10 seconds on your left arm, make sure you go ten seconds on your right arm.
Weightless Squats

There are so many different types of squats that you can do.
Weightless squats don’t require you to float. They’re simply squats that you do without any added weight. These are bodyweight squats or squats that rely on your body weight for resistance.
They help you build lean muscle in your legs, thighs, and glutes. And, as you know, lean muscle can help your body burn fat. Squats are also great to help you boost hip mobility over time.
So, let’s talk about the proper form.
How to Do Bodyweight Squats:
There are a lot of variations to the standard squat, but I’ll start with the basics.
Before we begin, I just want to give you a reminder: don’t overextend your range of motion. Listen to your body, and before you know it, you’ll be able to squat farther every day.
To achieve the proper squat form, your starting position should be standing with your feet shoulder-width apart.
Next, bring the center of your hips straight down. If you’re using the proper squat form, your thighs are parallel to the ground, and your knees are over your toes.
Return to the standing position, but when you do so, make sure to squeeze your glutes and your abs.
So, as you stand, clench your booty and suck in your stomach. This will activate those two muscle groups.
Squats are one of the best exercises because you can change them up quite a bit. For example, you can bring your feet wider apart to work your inner thighs.
Another one you can do is point your toes out wide to work your quads, glutes, and core better.
Tip: as you go down to squat position, imagine yourself sitting. Reach your buns back to get a deeper squat.
Also, when you stand, be sure to squeeze your glutes. This is a great way to relieve pressure on your hip flexors.
Trick: women have an anterior pelvic tilt. This means that our pelvic bone tends to tilt forward. A good way to combat this is to put a rolled-up mat under your toes and the balls of your feet. This can help you balance better while you do your squats.
One-Leg Deadlift

I love deadlifts. And they’re important for women because our hamstrings are really weak.
A single-leg deadlift allows your muscle to stretch but also tightens it at the same time.
Keep in mind, these aren’t just for strength training. They can help you with balance and stability in your legs and upper body.
Additionally, they are a great exercise for weight loss and strengthening your core muscles.
Much like squats, there are several variations of single-leg deadlifts. I’m going to show you a few different ways you can do them.
How to Do Single-Leg Deadlifts:
Before you begin, it’s important to get the proper form for a single-leg deadlift.
You want your leg straight, but the leg your standing on should always be slightly bent. This will work your glutes better.
Begin in the standing position, and extend one leg straight back, making a straight line. Keep your upper body straight as you lean forward and put your fingertips to the ground.
You’re going to feel a stretch in your hamstring immediately.
Finally, bring your shoulders over your waist, and bring your extended leg back in.
You can alter this a little bit by changing the position of your extended leg.
For example, instead of extending your leg out all the way, simply put your big toe on the ground. This will take a little pressure off of your planted leg.
Tip: You can do a lot of reps with this exercise and not feel it, until the next day. And you’re going to feel a lot of pain the next day.
I can’t tell you how many times I woke up wondering what I did to myself. And then I realize, it was the deadlifts.
Calf Raises
There are tons of great benefits to doing standing calf raises. While they help strengthen your calf muscles, calf raises also help with shin splints.
They’re one of the most effective lower-leg exercises out there because the muscles used for calf raises are perfect for strengthening that area. And they’re simple.
Proper Calf Raises Form:
Begin in the standing position, and keep your back straight.
Raise your heels up until you’re on the balls of your feet. Try to avoid bending your knees.
As you go up, flex your glutes to help you maintain balance.
Then, bring your heels down. That’s a standing calf raise.
Another one you can do is to point your toes outward. This will help you get that V-shaped curve in your calves.
You can work your other major calf muscle by pointing your toes in and lifting your heels.
Finally, you can add a variation by never letting your heels touch the floor. This one will burn a little bit, but it’s an amazing calf workout.
Tip: if you have a step or a bench, you can put the balls of your feet on it, and press to bring your heels upward. This will work your calf muscles even more.
All of the variations of calf raises can be done this way.
Hanging Leg Raises
Most people do hanging leg raises for abs, because they work your abdominal muscles so well.
However, they do so much more than that.
They’re great for your hip flexors, and they’re the perfect cardio workout.
Now, many people make a common mistake of swinging the body. But don’t worry; I’ll show you how to avoid that.
How to Correctly do Leg Raises:
You’re going to need a pull-up bar or some type of grip bar overhead for this one.
Hold onto the bar and let your legs hang straight down. Then, all you do is lift your legs.
Imagine there is an elastic band connecting your belly button to your pelvis. As you lift your knees, imagine that the elastic band is getting shortened.
As you extend your legs downward, imagine the elastic is extending.
You’re going to feel your abs working overtime on this one.
In order to avoid swinging, control your momentum.
I, personally, love these exercises, because there are so many different variations.
You can do it with one leg, or you can do hanging leg raises with a twist by twisting your hips when your knees are raised.
Tip: if you don’t have a bar, you can sit on a bench or a step, and lean back. Pick your feet up and set them down. It will work the same muscles as the hanging leg raise.
Just make sure your butt is higher than the ground.
You can even sit on a chair and lift your knees up and put them down.
Mountain Climbers

Finally, we have the mountain climber exercises. These are great for core strength and cardiovascular exercise.
They’re a full-body workout that can help you reach your weight loss goals.
They’re also great for interval training, as they can be pretty intense.
Let me explain how to do them properly.
Proper Mountain Climbers Exercise Form:
To achieve proper form for mountain climbers, you should start in the plank position.
Then lift your knee and bring it toward your elbow. Make sure your knees and toes don’t touch the ground.
Continue doing this, but be sure to alternate legs. And always keep your back straight.
Start slowly, if you need to, but eventually, you’re going to want to speed this up.
It’ll look almost like you’re running toward the ground.
Tip: When you’re drawing your knee forward, I want you to imagine it tightening your core. Additionally, maintain stability through your back by keeping it straight.
Also, if you’re just starting out, I definitely recommend having your upper body slightly elevated.
Trick: you can add instability to make your hard work harder by resting your hands on a balance ball.
Bodyweight Exercises Burn Fat and Build Lean Muscle
Bodyweight exercises are perfect for circuit training. To do this, simply choose anywhere from three to five exercises and set the reps. Then just do them over and over again. Doing the exercises in a circuit will help you avoid exhausting the muscles.
Another way to add bodyweight exercises is to add a few of them to your regular workout routine or warmups. Choose the best bodyweight exercises for you. If you find that some of them hurt your knees or overexert certain areas, try picking other ones.
Remember that bodyweight workouts are great for strength training, and they can help you build lean muscle.
There isn’t much else to say about bodyweight exercises. You just have to do them.
Your body will love you for it, even if it burns a little (or a lot).
Our bodies are made to move and be used. When we can actually use our own body weight to get a great workout, it opens up a lot of possibilities.
Best of all, you really don’t need a lot of equipment. As a matter of fact, all of the exercises I’ve described here can be modified to not use any equipment at all.
So, what are you waiting for? Put your bodyweight to work!